Disclaimer: The following information is for research and experiment purpose only. It's not the author's intention to circumvent Cisco's licensing. Neither does the author encourage software piracy. You cannot hold the author responsible for any disputes/lawsuits caused by this information. If you disagree, please stop reading.
UCCX installation DVD comes with some demo licenses. Unfortunately, unlike CUCM, UCCX demo license expires in 30 days. And you'll get the warning every time you log into UCCX administration page.

If you look at the NodeConfig in CET Tool, you'll see the "Grace Period Starting Date" and "Demo License Flag".

To stop the demo license from expiring, three things need to be done:
1) "Demo License Flag" should be "false"
2) "Grace Period Staring Date" should be blank.
3) Most importantly, your license MAC has to match the MAC in license file (which is "FFFFFFFFFFFF" in this case).
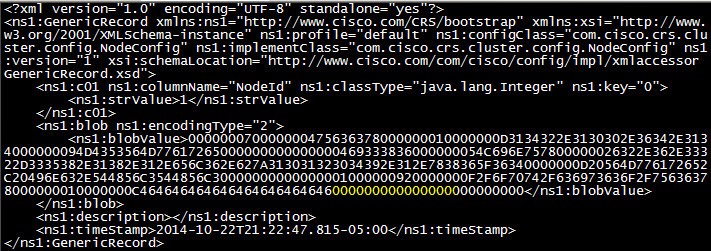
For #1 and #2, you need to modify the XML file in directory /opt/cisco/uccx/ClusterData/default/com.cisco.crs.cluster.config.NodeConfig. Change the last 16 characters in the block to 0 (zero).
First 8 characters (4 bytes) is the "Grace Period Starting Date" in epoch time format. Second 8 characters (4 bytes) is the "Demo License Flag" (1 stands for "true" while 0 stands for "false").
Before:

After:

Then change the License MAC to "FFFFFFFFFFFF".
Before:

After:

Reboot the system to take effect. You'll notice that you don't get the license expiring warning when you log into UCCX admin web page.
Restart CET just to verify the changes we made:

P.S.
1. "/opt/cisco/uccx/ClusterData/default/com.cisco.crs.cluster.config.NodeConfig" is a directory. The file names in this directory are randomly created. You need to modify the one with .xml extension.
2. This method was last verified on UCCX 10.5.1.10000-24, though 8 additional octets were added to the end of the xml file.
XML file before:

XML file after: