- You are already using GNS3 and know how to build basic routing/switching lab.
- You understand the concept of GNS3 appliance.
- You know how to download software from Cisco (sorry I cannot provide any Cisco software images or licenses)
This blog is based on the following software:
- Windows 10
- VMware Workstation Pro for Windows
- GNS3 2.2.7 for Windows (with GNS3 VM)
Cisco software images (download from cisco.com):
- vManage: viptela-vmanage-19.2.2-genericx86-64.qcow2
- vSmart: viptela-smart-19.2.2-genericx86-64.qcow2
- vEdge: viptela-edge-19.2.2-genericx86-64.qcow2
- vBond (same image as vEdge)
- CSRv with SD-WAN: csr1000v-universalk9.17.02.01r-serial.qcow2. This file is optional. It is a Cisco version of vEdge (a.k.a. cEdge). Some customers prefer using Cisco routers as SD-WAN edge because they already have them purchased. In your lab, you may use vEdge, cEdge or both.
GNS3 Appliance Templates (download from gns3.com):
- vManage: viptela-vmanage-genericx86-64.gns3a
- vSmart: viptela-smart-genericx86-64.gns3a
- vEdge: viptela-edge-genericx86-64.gns3a
- vBond: Make a copy of the vEdge file above, name it viptela-bond-genericx86-64.gns3a, change line 2, 4 and 8 to indicate a vBond template. It's just cosmetic. Example as below:
{
"name": "vBond",
"category": "router",
"description": "vBond",
"vendor_name": "Cisco",
"vendor_url": "https://www.cisco.com",
"documentation_url": "http://www.cisco.com/",
"product_name": "VIPtela Bond",
Empty QEMU disk file (download from https://sourceforge.net/projects/gns-3/files/Empty%20Qemu%20disk/):
- empty30G.qcow2
License file (generate from cisco.com. See https://codingpackets.com/blog/cisco-sdwan-self-hosted-lab-part-1/ for details):
- serialFile.viptela
SD-WAN icons (png format, download from below):
- vManage

- vSmart

- vBond

- vEdge

Steps to import SD-WAN appliances into GNS3
1. From GNS3 > File > Import Appliance.

2. Choose the GNS3 Appliance file (.gns3a) from your hard drive. e.g viptela-smart-genericx86-64.gns3a

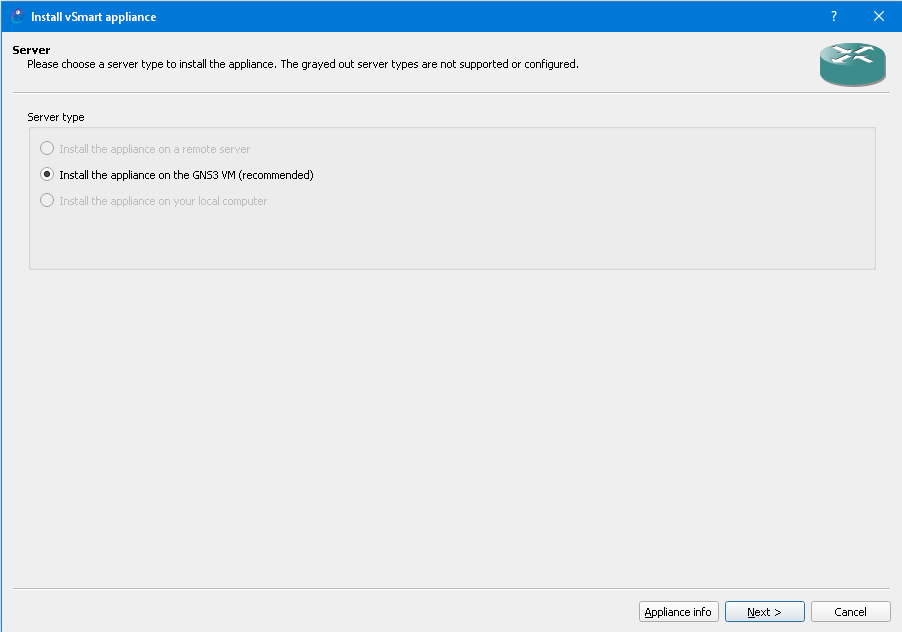
3. Install the appliance on GNS3 VM
4. QENU V3.1.0 is chosen by default

5. Cisco software image we use here is version 19.2.2, which is not on the list. We may choose "Create a new version".

6. Type in 19.2.2. Again, this is cosmetic only. You may upload 19.2.2 image under the label 19.2.0 and it still works. But it is a good idea always be accurate.

7. Highlight the missing file under the newly created 19.2.2 version, and click "import"

8. Locate the Cisco SD-WAN image file (.qcow2 file) on your hard drive. It will start uploading to GNS3 VM once you choose the file. For some appliances (such as vManage), you will need a secondary qcow2 file (empty30G.qcow2). Repeat the same steps to import the second file.

9. Once it finish uploading, you will see "ready to install" message.

10. Click "Next" to continue install. Click "Yes" to confirm.

11. Here is the completion screen.

12. SD-WAN appliances are put into "Router" category in GNS3. By default, router appliances are given the dark green hockey puck icon. Optionally, you may change that to more distinguishable SD-WAN icons. Right-click on the newly added template, then choose "Configure Template".

13. In "General Settings" tab, click "Browse" button on the "Symbol" line.

14. You may either choose from a set of pre-installed symbols(icons), or choose to upload a custom one. Here we choose to upload a PNG file. You should already downloaded the SD-WAN icons in previous steps. Use "Browse" button to locate the PNG file on your hard drive.

15. Now you have the beautiful light blue SD-WAN icons for each appliance templates.


No comments:
Post a Comment